
TLDR
- Use Image Trace in Adobe Illustrator when you need to turn a simple raster image, scanned sketch, low-resolution logo, or black-and-white drawing into editable vector artwork.
- Image Trace works best on clean, high-contrast artwork with clear edges. It is not a magic fix for blurry screenshots, tiny text, complex photos, or badly compressed files.
- For sticker artwork, trace first, then clean up the paths, simplify extra anchor points, check the edges, and add a proper cutline or border.
- Use vector formats like AI, SVG, or PDF when possible. YouStickers recommends vector files for crisp logos and text, with 300 DPI at final size for raster artwork.
- Always review the proof carefully before printing, especially the shape, border, and cutline placement.
Using Image Trace in Adobe Illustrator can help turn pixel-based artwork into cleaner vector sticker artwork, but it works best when you know what the tool is good at. A simple logo, icon, sketch, or one-color illustration can often be traced into a clean sticker file. A blurry photo, tiny screenshot, or detailed shaded image may still need manual cleanup or a full redraw.
For sticker printing, the goal is not just to make the image “vector.” The goal is to make artwork that prints cleanly, scales well, has smooth edges, and can support a clear cutline. Adobe describes Image Trace as a tool that converts raster images into editable vector graphics, but the quality of the result depends heavily on the source image and the settings you choose.
What Image Trace Does
Image Trace converts a raster image into vector paths. Raster images are made of pixels, so they can look blurry or jagged when enlarged. Common raster formats include JPG and PNG. Vector artwork is made from paths and shapes, so it can scale more cleanly for logos, text, icons, and sticker designs.
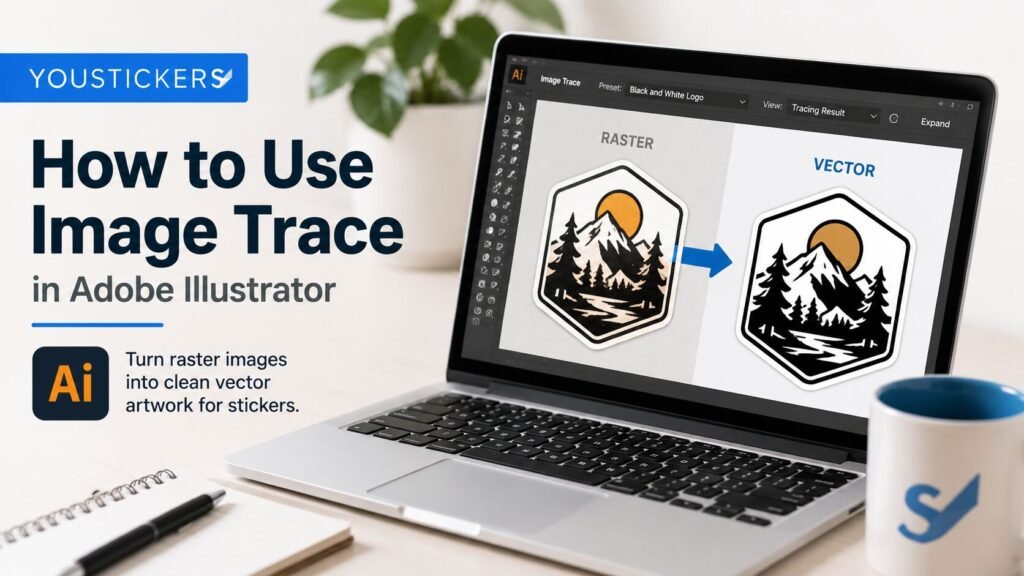
In Illustrator, Adobe’s basic workflow is to place the raster image, select it, open Window > Image Trace, choose a preset, adjust the settings, and then expand the result if you want editable paths.
That last step matters. Until you expand the trace, the result is still controlled by Image Trace settings. After you expand it, the artwork becomes editable vector paths, but you can no longer adjust the original tracing options.
When Image Trace Is Useful for Sticker Artwork
Image Trace is useful when your artwork has clear edges and limited colors. It can be a good fit for:
- simple logos
- bold icons
- black-and-white artwork
- hand lettering
- scanned sketches
- line art
- mascots with flat color areas
- simple badge designs
- old artwork that needs cleaner edges
- one-color decals or transfer-style artwork
Image Trace is less useful when the file is too complex or too messy. It is usually not the best choice for:
- detailed photographs
- soft watercolor artwork
- tiny text
- screenshots
- low-resolution web images
- logos with exact geometric shapes
- heavily compressed JPGs
- artwork with lots of shadows, textures, and gradients
Adobe’s own Image Trace optimization guide warns that exact geometric logos, icons, symbols, and straight-line artwork are often better recreated manually because tracing software sees pixels, not the intended clean shapes.
Before You Trace: Clean Up the Source Image
The cleaner the image is before tracing, the better the vector result will be. Do not start with a messy screenshot if you can get the original logo, PNG, PDF, SVG, or AI file.
Before opening Illustrator, check the artwork:
- Crop away extra background.
- Remove dust, scanner marks, and stray specks.
- Increase contrast if the image is faded.
- Remove unwanted paper color or background texture.
- Use the highest-resolution version you have.
- Avoid tracing from social media screenshots.
- Save clean artwork as PNG, TIF, or PSD when possible.
Adobe recommends spending time optimizing images before tracing and specifically notes that removing unneeded background, dust, scratches, and faint paper color can help produce better results. Adobe also notes that PNG, TIF, or PSD are better choices for optimized graphic artwork, while JPEG is more appropriate for photos.
For sticker work, this step is especially important around the outer edge of the design. A dirty background or fuzzy edge can turn into a messy cutline later.
How to Use Image Trace in Adobe Illustrator
1. Create a new Illustrator document
Open Illustrator and create a new document. Use a size close to the final sticker size if you know it. For example, if the sticker will be 3 inches wide, build the artboard around that general size.
This helps you judge whether small details, thin lines, and text will be readable at the actual printed size.
2. Place your image
Go to File > Place, select your raster image, and place it on the canvas. Adobe lists this as the first step for tracing an image with full Image Trace options.
You can trace a linked or embedded image, but for sticker prep it is usually safer to keep your working file organized and make sure the image is available with the document.
3. Select the image
Click the image with the Selection Tool. Image Trace options only become active when a raster image is selected. Adobe’s Image Trace panel documentation notes that the tracing options are active only when an image is selected.
If Image Trace is grayed out, check whether the image is selected, locked, hidden, or inside a clipping mask.
4. Open the Image Trace panel
Go to Window > Image Trace. The panel gives you more control than simply clicking a quick preset from the Properties panel.
For sticker artwork, the full panel is usually better because you can adjust color count, threshold, paths, corners, noise, transparency, and preview settings.
5. Choose a preset
Start with the preset closest to your artwork:
| Artwork type | Starting preset or mode |
|---|---|
| Black logo on white background | Black and White |
| One-color line art | Black and White |
| Simple color mascot | Low Color or limited color trace |
| Detailed color illustration | High Color, then simplify carefully |
| Sketch or lettering | Black and White or Grayscale |
| Outline-only art | Outline |
Adobe’s Image Trace panel includes options such as Auto-Color, High Color, Low Color, Grayscale, Black and White, and Outline. Auto-Color creates a posterized image, High Color creates a more photorealistic result, Low Color simplifies photorealistic artwork, Black and White simplifies the image into black-and-white artwork, and Outline simplifies the image into black outlines.
For stickers, simpler is often better. Too many colors and too many paths can create a file that is harder to edit and less clean at the edges.
6. Turn on Preview and adjust settings
Turn on Preview so you can see the result as you adjust the settings. Then adjust the trace based on the artwork.
Important settings include:
- Mode: Choose Color, Grayscale, or Black and White.
- Threshold: For black-and-white traces, this controls which pixels turn black and which turn white.
- Colors: For color traces, reduce the number of colors if the artwork becomes too busy.
- Paths: Higher values follow the original pixels more tightly; lower values create looser paths.
- Corners: Higher values create more sharp corners.
- Noise: Higher values ignore more small specks or details.
- Transparency or Ignore Color: Useful when you do not want a white background included in the vector result.
Adobe explains that Threshold controls the cutoff for black-and-white tracing, Paths controls how closely the traced shape follows the original pixel shape, Corners controls corner emphasis, and Noise controls the pixel area ignored while tracing. Adobe also notes that Transparency can prevent a transparent background from tracing as white, while Ignore Color can exclude a selected color from the trace.
7. Compare the trace to the original
Use the View options in the Image Trace panel to compare the trace result with the source image. Adobe notes that the View option can show the trace result or source image with or without outlines, and you can press and hold to compare the trace with the source.
For sticker artwork, look closely at:
- outer edges
- eyes, faces, and small details
- small text
- thin lines
- corners
- color separations
- unwanted background shapes
- rough or lumpy curves
Do not approve the trace just because it looks good zoomed out. Zoom in and check the edge quality.
8. Expand the trace
When the trace looks good, click Expand. Adobe explains that Expand converts the Image Trace result into editable vector paths that are grouped.
After expanding, save a copy of the file before doing heavy edits. This gives you a version to return to if cleanup goes badly.
9. Clean up the paths
After expanding, the artwork may have too many shapes, points, or stray pieces. This is normal.
Clean up the trace by:
- deleting unwanted background shapes
- removing stray specks
- smoothing rough edges
- simplifying excessive anchor points
- combining shapes where appropriate
- fixing broken letters or tiny details
- adjusting colors
- redrawing weak areas manually
Adobe recommends using Object > Path > Simplify to remove excess anchor points after expanding a trace.
For sticker printing, simpler vector paths are usually easier to work with than thousands of tiny traced fragments.
Add a Sticker Cutline or Border
Image Trace only creates the artwork. It does not automatically create the ideal sticker cutline.
After the artwork is cleaned up, create or check the cutline:
- Duplicate the outer artwork shape.
- Use Pathfinder or shape tools to create one clean outer silhouette.
- Add an offset border if the design needs a white outline.
- Keep important details away from the cut edge.
- Make sure the cutline is smooth, not jagged.
- Use a clearly named cutline layer if you are preparing a production file.
If you are not comfortable making your own cutline, you can upload the artwork and review the proof. YouStickers says customers can upload PNG, JPG, PDF, AI, or SVG files, and the proof process lets you review the setup, shape, and overall look before production.
Best File Types After Image Trace
Once the artwork is traced and cleaned, save an editable Illustrator file for yourself. For uploading or sharing, vector formats are usually best for crisp logos and text.
Good final file options include:
- AI
- SVG
- high-resolution PNG with transparency, when vector is not needed
- JPG only when transparency is not needed
YouStickers recommends 300 DPI at final print size for raster files, PNG for transparency, JPG when transparency is not needed, and PDF, SVG, or AI as the best formats for logos and crisp text.
Common Image Trace Mistakes
Tracing a tiny screenshot
A small screenshot does not contain enough clean detail. Image Trace may turn it into vector paths, but the paths will often preserve the screenshot’s jagged edges and compression artifacts.
Using too many colors
A high-color trace can create a complicated file with lots of tiny shapes. For stickers, simplified color is usually cleaner and easier to print.
Forgetting to remove the background
If you trace a logo on a white or off-white background, Image Trace may create a white box or unwanted background shapes. Use transparency, ignore color, or remove the background before tracing.
Leaving rough edges
A traced file may look clean at normal viewing size but still have rough, bumpy edges when zoomed in. Those edges can affect the sticker border and cutline.
Tracing small text
Small text often traces poorly. If possible, retype text in Illustrator, choose the correct font, and convert the final text to outlines before sending the file.
Assuming vector means print-ready
A file can be vector and still be messy. Print-ready sticker artwork still needs readable design, good margins, clean paths, correct sizing, and a proof review.
Expanding too early
Once you expand a trace, you cannot adjust the Image Trace settings anymore. Make sure the trace settings are close before expanding, or save a copy before expanding.
Practical Recommendation
Use Image Trace in Adobe Illustrator for simple sticker artwork with strong contrast, clean edges, and limited colors. It is a useful tool for turning sketches, icons, bold logos, and simple raster art into editable paths.
Do not rely on Image Trace to rescue every bad file. If the artwork has exact geometry, small text, heavy compression, blurry edges, or complex shading, manual cleanup or redrawing may produce a better sticker.
For the cleanest workflow, start with the best source image available, trace with simple settings, expand the result, clean the paths, create a smooth cutline, and upload a vector file when possible.
FAQs
Is Image Trace good for sticker artwork?
Yes, Image Trace is good for sticker artwork when the source image is simple, clean, and high contrast. It works best for logos, line art, icons, sketches, and flat-color illustrations.
Does Image Trace make artwork high resolution?
Not exactly. Image Trace converts pixels into vector paths, but it does not magically restore missing detail. A blurry or compressed source image can still produce rough vector artwork.
Should I use Image Trace for a logo?
Use Image Trace for a logo if the logo is simple and you do not have the original vector file. If the logo has exact geometry, small text, or precise brand shapes, redrawing or getting the original AI, SVG, EPS, or PDF file is usually better.
What Image Trace preset should I use for stickers?
For simple one-color artwork, start with Black and White. For flat-color illustrations, start with Low Color or a limited color setting. For detailed artwork, try High Color only if you are prepared to simplify and clean the result.
Do I need to expand Image Trace before sending the file?
If you want the traced artwork to behave like normal editable vector paths, yes. Adobe says Expand converts the trace result into editable paths. Save a copy before expanding in case you need to adjust the trace settings later.
Can YouStickers help if my file is not print-ready?
Yes. YouStickers says customers can upload artwork and review a free online proof before production, and its site notes that if artwork is not fully print-ready, the team can help clean it up.
