
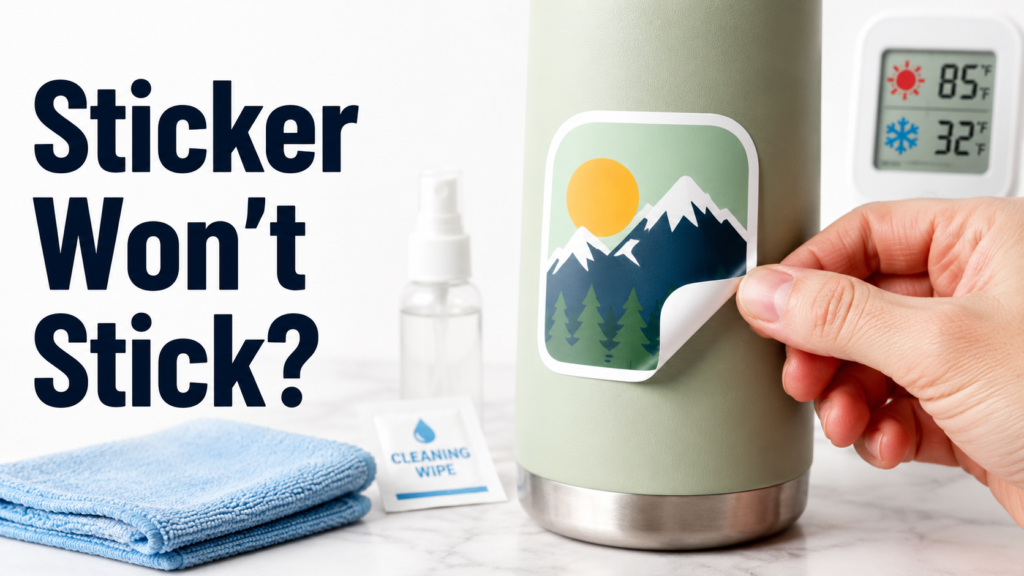
TLDR
- Stickers adhere best to surfaces that are clean, smooth, dry, and moderately warm.
- Dust, oil, wax, silicone, soap residue, condensation, texture, and cold temperatures are common causes of weak adhesion.
- Clean the surface, let it dry completely, warm the sticker and surface to roughly 60–80°F, then apply firm pressure from the center outward.
- Polypropylene, polyethylene, silicone, rubber, powder coatings, and heavily textured plastics can be difficult for standard sticker adhesives.
- If the adhesive has been touched, covered in dust, repeatedly repositioned, or exposed for too long, replacing the sticker is usually better than trying to add glue.
When a new sticker will not stay down, the adhesive is not automatically defective.
Most adhesion problems come from one of four things: something is covering the surface, the surface is too rough, the temperature is wrong, or the sticker material is not compatible with what it is being applied to.
The fastest fix is to stop pressing the same lifting edge over and over. Remove the sticker if it can still be lifted cleanly, identify the likely cause, prepare the surface correctly, and try again only if the adhesive is still clean and undamaged.
Quick Sticker Adhesion Troubleshooting Table
| Problem | Likely Cause | Best Next Step |
|---|---|---|
| Sticker falls off immediately | Dust, oil, wax, or incompatible surface | Clean and test the surface |
| Corners lift overnight | Inadequate pressure, curve, texture, or cold | Warm the area and press firmly |
| Sticker sticks in the center but not the edges | Surface is curved or sticker is too large | Use a smaller or more flexible sticker |
| Sticker slides or feels weak | Moisture, condensation, or cleaner residue | Remove, dry completely, and reapply |
| Sticker will not stick to plastic | Low-surface-energy plastic | Test another material or stronger adhesive |
| Sticker lifts from a tumbler | Curvature, coating, washing, or hand oils | Clean carefully and reduce sticker size |
| Car sticker will not adhere | Wax, ceramic coating, cold paint, or textured trim | Remove contaminants and use smooth paint or glass |
| Wall sticker falls down | Texture, low-VOC paint, dust, or uncured paint | Test a small area and use a wall-rated product |
| Reused sticker no longer sticks | Adhesive is contaminated or damaged | Replace the sticker |
| Only one area lifts | Finger contact, seam, ridge, or missed pressure | Clean if possible and re-press the edge |
Start With the Surface, Not the Sticker
Pressure-sensitive adhesive works by making close contact with the surface beneath it.
A smooth glass panel offers a large, consistent contact area. A textured storage bin may touch only the high points of the texture. Dust, oil, or wax creates another layer between the adhesive and the actual surface.
That is why the same sticker may hold securely on a laptop lid but peel from a textured cooler, silicone case, powder-coated bottle, or plastic toolbox.
3M’s current substrate-preparation guidance says application surfaces should be treated as contaminated and cleaned immediately before installation because even newly cleaned surfaces can quickly collect dust.
Step 1: Identify What the Surface Is Made From
Before cleaning or applying more pressure, identify the surface.
Usually Sticker-Friendly Surfaces
Standard vinyl stickers commonly perform well on:
- Clean glass
- Smooth painted metal
- Stainless steel
- Smooth acrylic
- Finished laptop lids
- Smooth hard plastic
- Sealed, smooth packaging
- Clean vehicle glass
- Sound automotive paint
Compatibility still depends on coatings, texture, temperature, and adhesive type.
Frequently Difficult Surfaces
Standard adhesives may struggle with:
- Silicone
- Rubber
- Polypropylene
- Polyethylene
- Flexible plastic
- Heavily textured plastic
- Fabric
- Unsealed wood
- Brick
- Concrete
- Powder-coated finishes
- Soft-touch coatings
- Waxed surfaces
- Ceramic-coated vehicles
- Fresh or chalky paint
Polyethylene and polypropylene are examples of low-surface-energy plastics. Standard pressure-sensitive adhesives often have more difficulty spreading across and gripping these materials than they do on glass or metal. Specialized adhesives are available for low-surface-energy applications, but an ordinary custom sticker may not use one.
Step 2: Clean the Surface Properly
A sticker cannot bond well through dirt, oil, polish, condensation, or cleaner residue.
Basic Cleaning Method
- Remove visible dirt with mild soap and water.
- Rinse away the soap.
- Dry the surface with a clean, lint-free cloth.
- For compatible glass, metal, or hard plastic, use a final light wipe with isopropyl alcohol.
- Wipe the surface dry before the alcohol evaporates.
- Apply the sticker soon after cleaning.
The YouStickers applying and removing stickers guide recommends isopropyl alcohol and a lint-free cloth, followed by complete drying.
Test any cleaner on a hidden area first. Alcohol can affect some painted, printed, coated, soft-touch, or delicate surfaces.
Avoid Cleaners That Leave a Film
Be cautious with:
- Furniture polish
- Tire shine
- Silicone spray
- Hand lotion
- Conditioning cleaners
- Oil-based cleaners
- Wax-containing soaps
- Some automotive wash products
- Some glass cleaners
- Ceramic detailing sprays
A surface may look shiny and clean while carrying a thin coating that makes adhesive bonding difficult.
3M specifically warns that wax, oil, lotion, and even some window-cleaning products can interfere with vehicle-graphic adhesion.
Step 3: Let the Surface Dry Completely
Water-resistant stickers still need a dry surface during installation.
Water, condensation, and cleaner trapped under the adhesive can cause:
- Weak initial tack
- Cloudy spots
- Bubbles
- Sliding
- Edge lift
- Premature peeling
Cold bottles and vehicles are particularly likely to develop condensation. A surface may feel dry when brought indoors, then become damp as humid air contacts it.
Wait until the surface reaches room temperature and no new moisture appears.
Step 4: Check the Temperature
Cold adhesive becomes firmer and may not flow into the microscopic irregularities of the surface. Excessive heat can make some adhesives grab too quickly, making alignment difficult and trapping air.
YouStickers recommends applying stickers when both the sticker and surface are approximately 60–80°F.
Industry guidance varies by material. Avery Dennison explains that lower temperatures reduce initial tack, while higher temperatures can make adhesive more aggressive and harder to reposition. Product-specific minimum and maximum temperatures should therefore take priority.
When the Surface Is Too Cold
Move the item indoors and give it time to warm naturally.
Do not blast an ordinary sticker with a heat gun. Excessive heat can distort vinyl, damage laminate, soften plastic, or affect the surface underneath.
A household hair dryer on a low setting may gently warm a durable surface, but keep it moving and stop if the sticker or surface begins to feel hot.
When the Surface Is Too Hot
Move the item into the shade or a climate-controlled room. Allow hot glass, metal, or vehicle paint to cool before applying the sticker.
Step 5: Avoid Touching the Adhesive
Fingerprints transfer natural skin oils onto the adhesive.
Hold the sticker by its edges and avoid placing fingers underneath it. For larger stickers, peel only a small section of liner at first rather than exposing the entire adhesive surface.
Once the adhesive has picked up lint, dust, pet hair, or fingerprints, cleaning it without damaging it is difficult.
Step 6: Apply Firm, Even Pressure
Pressure is what brings the adhesive into closer contact with the surface.
Apply the sticker slowly, then press from the center toward the edges. Use overlapping strokes so no section is missed.
Useful tools include:
- A felt-edged squeegee
- A clean plastic card wrapped in a soft cloth
- A small rubber roller
- Clean fingertips for a small sticker
Avery Dennison’s application guidance recommends firm, overlapping strokes and re-squeegeeing edges to reduce lifting.
Pay special attention to:
- Corners
- Narrow points
- Thin extensions
- Curved edges
- Areas near seams
- Parts of the sticker you may have touched
Step 7: Give the Adhesive Time to Bond
A sticker may feel attached immediately while the adhesive continues building contact over time.
Avoid washing, heavy rubbing, outdoor exposure, or repeated handling for at least 24 hours after application. YouStickers recommends avoiding heavy handling or washing during this period and suggests checking a test sticker after 24 hours when surface compatibility is uncertain.
For vehicle graphics, 3M similarly advises allowing time in moderate temperatures before exposing newly installed film to cold, wet conditions or washing.
Why Sticker Edges Keep Lifting
Edge lift is often caused by tension.
A flat sticker placed around a curve naturally tries to return to its original flat shape. The adhesive must resist that force continually.
Common examples include:
- Large stickers wrapped around narrow bottles
- Wide stickers on tapered tumblers
- Stickers crossing a ridge
- Graphics folded over a box corner
- Thick laminated stickers on tight curves
- Stickers applied over recessed lettering
- Designs with long, narrow points
How to Reduce Edge Lift
- Use a smaller sticker
- Choose a shape with rounded corners
- Avoid wrapping over a sharp curve
- Place the sticker on the flattest available area
- Use a more flexible material
- Keep intricate points away from high-contact areas
- Apply extra pressure around the perimeter
- Test the shape before placing a large order
Changing the sticker size or shape often works better than trying to force the same sticker onto an incompatible curve.
Why Stickers Struggle With Textured Surfaces
Texture reduces contact.
On a pebbled plastic cooler, for example, the adhesive may touch only the tops of the raised texture. Air remains in the low areas, leaving less bonded surface.
Pressing harder may help slightly, but it cannot make a flat sticker fully conform to deep texture.
3M does not recommend ordinary vehicle graphic films on textured unpainted plastic, rubber, silicone, or flexible plastic because compatible, or flexible plastic because. citeturn332180view0turn279677view0
For textured surfaces, consider:
- A smaller sticker
- A high-tack product rated for texture
- A rigid sign or tag
- A magnet on compatible metal
- Mechanical attachment
- A smooth mounting plate
- Direct printing
- A different placement area
Why Stickers Do Not Stick to Silicone Cases
Silicone is intentionally difficult to bond to. Its low surface energy helps it resist contaminants, but that same property makes many standard adhesives release easily.
Cleaning a silicone phone case may remove dirt, but it will not fundamentally change the surface.
Better options include:
- Applying the sticker to the phone beneath a clear case
- Using a hard polycarbonate case instead
- Printing directly on the case
- Using a product specifically designed for silicone
- Choosing another surface
Adding craft glue or super glue to a printed vinyl sticker is not recommended. It can discolor the print, damage the case, create a brittle lump, or make later removal difficult.
Why Stickers Peel From Vehicles
Vehicle adhesion problems commonly involve:
- Car wax
- Ceramic coatings
- Detailing sprays
- Road film
- Cold paint
- Moisture
- Oxidized paint
- Textured plastic trim
- Rubber seals
- Fresh or damaged paint
Apply vehicle stickers only to sound, smooth paint or compatible glass.
Avery Dennison advises removing dirt, grime, grease, oil, wax, polish, and protective coatings before applying pressure-sensitive vehicle film. It also notes that some ceramic or polym. citeturn562344view3turn124224view3
Do not place a standard sticker on:
- Tire sidewalls
- Rubber trim
- Textured bumper plastic
- Flexible mud flaps
- Areas with peeling clear coat
- Rust
- Freshly repaired paint
- Surfaces covered in wax or ceramic coating
For more vehicle-specific advice, see Best Sticker Material for Cars, Trucks, and Outdoor Equipment.
Why Stickers Peel From Water Bottles and Tumblers
Common causes include:
- Powder coating
- Silicone sleeves
- Strong curvature
- Hand oils
- Condensation
- Applying immediately before washing
- Dishwasher heat and detergent
- A sticker that is too large for the bottle
- Textured or soft-touch finishes
Smooth stainless steel is usually easier than heavily textured powder coating. A small sticker also experiences less tension than a large design wrapped around much of the bottle.
Clean the area, allow it to dry, apply at room temperature, and wait at least 24 hours before washing.
The waterproof, weatherproof, and water-resistant sticker guide explains why water-resistant construction cannot cce preparation. citeturn997609search8
Why Wall Stickers Fall Down
Walls can be more difficult than they appear.
Possible problems include:
- Dust
- Flat or chalky paint
- Low-VOC paint
- Fresh paint
- Texture
- Moisture
- Poorly bonded paint
- Cleaning products
- Applying a general sticker instead of a wall-rated material
Avery Dennison notes that wall texture, paint, temperature, and film selection all affect adhesion. It recommends testing wall compatete installation. citeturn562344view2
Do not assume that stronger adhesive is always the answer. An aggressive sticker may stay attached but pull off paint during removal.
Can You Make an Old Sticker Sticky Again?
Sometimes a recently removed sticker can be reapplied if:
- It was removed carefully
- The adhesive remained clean
- The sticker did not stretch
- The new surface is compatible
- The sticker was not exposed to dust
However, a sticker is usually not worth reusing when:
- The adhesive is covered in lint
- The edges have curled
- The vinyl has stretched
- The sticker has creases
- The liner was discarded and the adhesive was exposed
- The sticker was washed
- It has been removed several times
- The adhesive stayed on the old surface
- The sticker has become brittle
Do not spray the back with general-purpose adhesive unless the surface and permanence do not matter. Spray adhesive can create uneven thickness, overspray, residue, staining, and difficult removal.
For temporary reuse on smooth glass, a purpose-made window cling is a better option than repeatedly removing an ordinary adhesive sticker.
Surface Compatibility Test
Before applying a large sticker or ordering a high quantity:
- Clean a small test area.
- Apply a small sticker made from the intended material.
- Press it firmly.
- Leave it undisturbed for 24 hours.
- Check the center, corners, and edges.
- Expose it to expected handling or temperature.
- Remove it carefully if removability matters.
This test is especially useful for:
- Powder-coated bottles
- Storage bins
- Walls
- Painted furniture
- Vehicles with coatings
- Unfamiliar plastics
- Textured equipment
- Rental properties
A small test is more reliable than guessing from the general name of the material.
Common Mistakes
Applying Over Soap Residue
Rinsing and drying matter. Soap can leave a film even when the surface looks clean.
Cleaning With a Wax-Containing Product
A polished surface is not necessarily an adhesive-friendly surface.
Applying to a Cold Bottle or Vehicle
Cold adhesive may develop weak initial contact, and condensation can form beneath the sticker.
Using a Sticker That Is Too Large for the Curve
The sticker continually pulls against its own adhesive.
Pressing Only the Center
Edges and corners need firm pressure too.
Touching the Entire Adhesive Side
Finger oils and dust reduce the clean bonding area.
Washing Immediately
Give the adhesive time to build contact before exposing it to water and abrasion.
Adding Glue Without Understanding the Surface
Extra glue can damage both the sticker and the object without fixing the underlying compatibility problem.
Assuming All Plastic Is the Same
Smooth acrylic and polypropylene may look similar but behave very differently with adhesive.
Practical Recommendation
When a sticker will not stick, use this order:
- Confirm that the surface is smooth and compatible.
- Remove dust, oil, wax, and cleaner residue.
- Let the surface dry completely.
- Bring the sticker and surface to a moderate temperature.
- Apply without touching the adhesive.
- Use firm pressure across the entire sticker.
- Leave it alone for 24 hours.
- Replace the sticker if the adhesive is already contaminated or damaged.
When the same problem happens repeatedly on silicone, rubber, textured plastic, powder coating, or low-surface-energy plastic, stop treating it as an application mistake. The surface probably needs a different adhesive or a different type of product.
FAQs
Why Does My Sticker Keep Peeling at the Corners?
The most common reasons are insufficient pressure, surface texture, contamination, a tight curve, or a sticker shape with sharp points. Clean the surface and press the perimeter firmly. A smaller sticker with rounded corners may work better.
Can I Use Rubbing Alcohol Before Applying a Sticker?
Rubbing alcohol can be useful on compatible glass, metal, and some hard plastics. Test it first and avoid delicate coatings, screens, printed surfaces, and finishes that may be damaged by alcohol.
Why Will My Sticker Not Stick to Plastic?
The plastic may be textured, flexible, contaminated with mold-release agents, or made from a low-surface-energy material such as polypropylene or polyethylene. Standard sticker adhesive may not be compatible.
Will Heating a Sticker Make It Stick Better?
Gentle warmth can help when the sticker and surface are too cold. Excessive heat can distort the sticker or damage the surface. Bring both to room temperature rather than using intense heat.
Should I Use Super Glue on a Peeling Sticker?
No. Super glue can damage vinyl, discolor the print, create a brittle edge, and permanently mark the surface. Replace the sticker or choose a material designed for the surface.
How Long Should I Wait Before Washing a New Sticker?
Wait at least 24 hours before heavy washing or handling. Longer may be appropriate when the surface is cold or the application is especially demanding.
Can I Reuse a Vinyl Sticker?
An ordinary adhesive sticker may be reusable once if removed carefully and kept clean, but it is not designed for repeated repositioning. A static cling is better when regular removal and reuse are required.
