
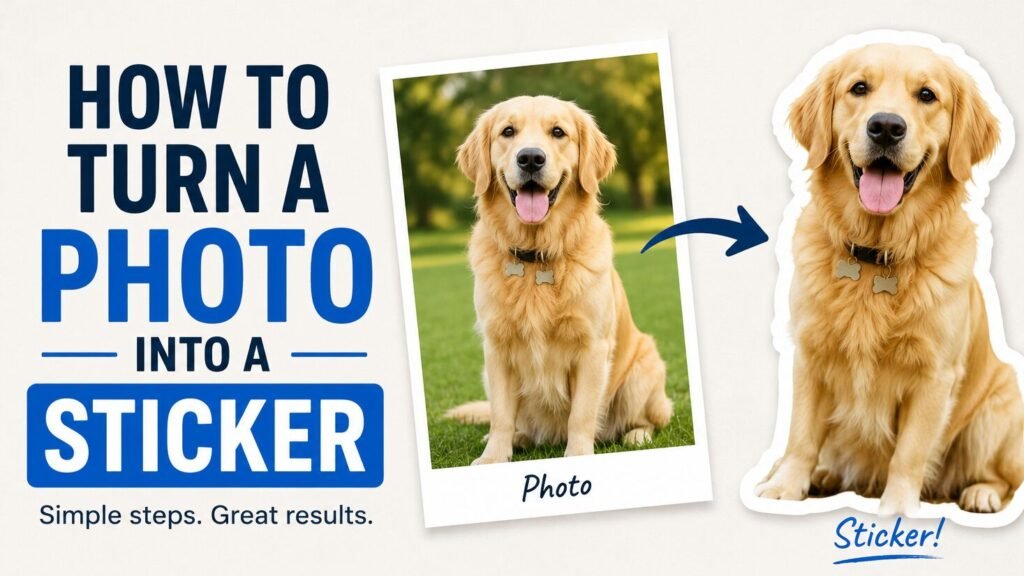
Before we begin, please note that our graphic design team can do this entire process for you! You can simply upload the photo and tell us what you want to be in the sticker. We can enhance it, remove the background, add the border, and print it.
TLDR
- Start with the highest-resolution photo you have. A blurry or tiny image will usually make a blurry sticker.
- Decide whether you want a full photo sticker, a cutout sticker, a face sticker, a pet sticker, a product sticker, or a photo inside a shape.
- Remove the background only if you want the sticker to follow the subject instead of printing as a rectangle.
- For close-viewed stickers, aim for about 300 PPI at the final print size. Adobe describes 300 pixels per inch as the standard for high-quality prints viewed up close.
- Export as a high-resolution PNG if you need transparency, or a high-quality JPG/PDF if the photo has a full background.
Turning a photo into a sticker is mostly about cleaning up the image, choosing the right sticker shape, and making sure the file has enough resolution for the size you want to print. A good photo sticker can be a pet sticker, family sticker, wedding favor, product label, sports team sticker, memorial sticker, laptop sticker, water bottle sticker, event giveaway, or small business packaging insert.
The key is to design for print, not just for the screen. A photo may look sharp on your phone but become soft when printed larger. A background may look fine digitally but feel distracting once it becomes a sticker. A cutout may look clean at normal size but have rough edges when zoomed in.
Here is the practical process for turning a photo into a sticker that prints cleanly.
Step 1: Choose the Right Photo
Start with the best version of the photo you have. The original camera file is usually better than a screenshot, social media download, messaging-app image, or compressed website image.
A good sticker photo should be:
- sharp, not blurry
- well lit
- high resolution
- not overly cropped
- not blocked by heavy shadows
- not covered with filters that hide detail
- large enough for the final sticker size
Avoid using tiny images pulled from Instagram, Facebook, screenshots, thumbnails, email previews, or website banners. Those files are often compressed and may not have enough detail for printing.
A simple test: zoom in to the subject’s face, logo, pet, product, or main detail. If it already looks soft or pixelated on screen, it will probably not improve in print.
Step 2: Decide What Kind of Photo Sticker You Want
Not every photo sticker should be designed the same way. Before editing, decide what final format makes sense.
Common photo sticker styles include:
| Sticker Style | Best For |
|---|---|
| Full rectangle photo sticker | Landscapes, cars, group photos, event memories |
| Circle photo sticker | Faces, pets, wedding favors, party stickers |
| Die cut photo sticker | Pets, people, mascots, products, objects |
| Face cutout sticker | Funny stickers, sports teams, birthdays, events |
| Photo with white border | Laptop stickers, water bottles, merch, giveaways |
| Photo inside a badge | Business branding, creator merch, school events |
| Sticker sheet | Multiple faces, pets, product shots, poses, or expressions |
If the photo background is important, keep it. If the subject is the only important part, remove the background and make a cutout-style sticker.
Step 3: Crop the Photo for the Sticker Shape
Cropping is one of the easiest ways to improve a photo sticker. A sticker is small, so the subject needs to be clear quickly.
For a pet sticker, crop closer to the pet’s face and body. For a person, avoid leaving too much empty space above the head. For a product sticker, show the product clearly without distracting background clutter.
Use these quick crop rules:
- For circle stickers, keep the subject centered.
- For die cut stickers, leave space around the subject for a border and cutline.
- For rectangle stickers, avoid placing important details too close to the edge.
- For group photos, choose a larger sticker size so faces remain readable.
- For product photos, keep the main object large enough to recognize at thumbnail size.
If the crop feels too tight on screen, it may feel even tighter once printed and cut.
Step 4: Remove the Background When Needed
You only need to remove the background if you want the sticker to follow the subject instead of printing the whole photo as a rectangle, square, or circle.
Background removal is useful for:
- pet stickers
- face stickers
- product cutout stickers
- character stickers
- mascot stickers
- sports stickers
- object stickers
- stickers with a clean white outline
Adobe’s Photoshop background-removal guide explains that Photoshop can isolate a subject and create a transparent background using tools like Remove Background, though edge cleanup may still be needed. Canva’s transparent background help page also explains that designs can be downloaded as PNG files with a transparent background when that option is selected.
After removing the background, check the edges carefully. Hair, fur, glass, shadows, bicycle spokes, plant leaves, and product reflections can leave rough or messy edges.
Step 5: Clean Up the Edges
A photo cutout sticker usually needs edge cleanup. Automatic background removers are helpful, but they can leave little problems that become more visible in print.
Look for:
- white halos
- gray haze
- leftover background pixels
- jagged edges
- missing hair or fur
- rough corners
- transparent holes inside the subject
- tiny floating pixels around the artwork
Place the cutout on a dark background, then on a light background. This makes edge problems easier to see. If the subject has a messy edge, you can either clean the mask manually or add a thicker white border around the sticker to hide minor imperfections.
Step 6: Add a Border Around the Photo
A white border is optional, but it often makes photo stickers look more finished. It also helps separate the image from the surface where the sticker will be applied.
A border works especially well for:
- pet stickers
- face stickers
- laptop stickers
- water bottle stickers
- sports stickers
- event stickers
- die cut photo stickers
- sticker sheets
For most photo stickers, a border between 0.08″ and 0.15″ is a good starting point. The border should be thick enough to protect the shape visually but not so thick that it overpowers the photo.
White borders are common because they work on most surfaces. Colored borders can also work, but they should support the image rather than compete with it.
Step 7: Improve Brightness, Contrast, and Color
Photos often print a little differently than they look on a bright phone screen. Before ordering, make sure the subject has enough contrast and detail.
Simple edits that can help:
- brighten a dark photo
- increase contrast slightly
- reduce heavy shadows
- correct overly warm or cold color
- sharpen lightly if the image is a little soft
- avoid extreme filters
- avoid oversaturation that makes skin, fur, or products look unnatural
Do not over-edit. A sticker should still look like the original subject. The goal is to make the image clear and printable, not artificially harsh.
Step 8: Check the Resolution at Final Sticker Size
Resolution matters most when you enlarge a photo. A file that looks good as a 2-inch sticker might not work as a 5-inch sticker.
A good rule for photo stickers is to aim for about 300 PPI at the final printed size. Adobe lists 300 PPI as the standard for high-quality prints viewed up close.
Here are useful targets:
| Sticker Size | Good Photo Size at 300 PPI |
|---|---|
| 2″ x 2″ | 600 x 600 px |
| 3″ x 3″ | 900 x 900 px |
| 4″ x 4″ | 1200 x 1200 px |
| 2″ x 4″ | 600 x 1200 px |
| 5″ x 5″ | 1500 x 1500 px |
These numbers are not the only factor, but they are a helpful starting point. A slightly lower-resolution image may still work for some designs, especially if the photo is simple and the sticker is small. But if the photo is already blurry, increasing the file size will not truly restore lost detail.
Step 9: Choose the Sticker Material and Finish
For most photo stickers, white vinyl is the safest material choice. It gives the image an opaque white base, which helps colors and contrast stay more predictable across laptops, water bottles, packaging, notebooks, cases, and other surfaces.
YouStickers’ custom sticker page describes its custom stickers as durable vinyl with custom sizes, custom shapes, free online proofs, and no minimums. The YouStickers homepage also notes that custom stickers are printed on durable vinyl with matte or gloss laminate options.
Choose matte if you want a softer, lower-glare look. Choose gloss if you want the photo to feel brighter and shinier. For colorful pet photos, outdoor photos, product shots, and bold event stickers, gloss can make the image feel more vibrant. For portraits, subtle branding, or softer designs, matte can look cleaner.
Clear stickers can work for certain photo designs, but they are usually not the first choice for full-color photos. A clear background lets the surface show through, which can change how the photo appears. For most photo stickers, white vinyl is more predictable.
Step 10: Export the File Correctly
The best export format depends on the design.
Use PNG when:
- the background is transparent
- the sticker is a cutout
- the design has a white border around a subject
- the artwork has clean edges and needs transparency
Use JPG when:
- the sticker is a full rectangle photo
- the background is intentionally part of the image
- the image is high quality and not heavily compressed
Use PDF when:
- the file includes text, layout, or vector elements
- the photo is part of a larger design
- you are preparing a more print-ready file
Use SVG, AI, or EPS only when the design is vector-based. A normal photo is raster, not vector, so saving a photo as an SVG does not automatically make it scalable.
Step 11: Upload and Review the Proof
Once the photo sticker file is ready, upload it and review the proof carefully. The proof is where you check the final size, shape, border, cutline, and overall look before production.
Pay attention to:
- sticker size
- cutline shape
- border thickness
- crop
- subject placement
- background removal
- small details
- text readability
- whether the image looks too dark
- whether any important part is too close to the edge
YouStickers offers free online proofs before production, which gives you a chance to review the setup, shape, and overall look before printing.
Best Photo Sticker Ideas
Photo stickers work well for both personal and business uses.
Good ideas include:
- pet face stickers
- baby shower stickers
- wedding favor stickers
- birthday party stickers
- graduation stickers
- memorial stickers
- sports team face stickers
- band or creator stickers
- real estate closing gift stickers
- employee appreciation stickers
- small business product photo stickers
- food truck menu item stickers
- event giveaway stickers
- family reunion stickers
- photo sticker sheets
For businesses, photo stickers can work especially well when the subject is recognizable: a product, mascot, food item, storefront, work truck, team member, or branded object.
Common Mistakes to Avoid
Using a screenshot
Screenshots are usually too low-resolution for quality sticker printing. Use the original photo whenever possible.
Cropping too tightly
Leave enough room around the subject for a border and cutline. If the subject is too close to the edge, the sticker can feel cramped.
Removing the background badly
Rough cutouts, white halos, and leftover pixels can make a sticker look unfinished. Always check the cutout on both light and dark backgrounds.
Choosing clear stickers for full-color photos
Clear stickers can be beautiful, but they are not always ideal for photos because the surface color can affect the image. White vinyl is usually more predictable.
Making the sticker too small
A detailed group photo or product shot may need a larger sticker. If the design contains faces, small objects, or text, size up.
Over-editing the image
Too much sharpening, saturation, or contrast can make a photo look harsh. Keep edits clean and natural.
Forgetting the proof
The proof is where you catch shape, crop, border, and cutline issues. Review it carefully before approving.
Practical Recommendation
For most photo stickers, start with a high-resolution image, crop around the subject, remove the background only if you want a cutout, add a clean white border, and export as a transparent PNG. Then order the sticker on white vinyl for the most predictable color and contrast.
Use a full rectangle or circle sticker when the whole photo matters. Use a die cut sticker when the subject is the focus. Use a sticker sheet when you have several photos, poses, products, faces, or pet expressions.
The simplest rule is this:
If the background helps the photo, keep it. If the subject is the sticker, remove the background and make a cutout.
FAQs
Can I turn any photo into a sticker?
Yes, but not every photo will print well. The best photo stickers start with sharp, high-resolution images that have a clear subject and good lighting.
What file type is best for a photo sticker?
Use a high-resolution PNG if the background is transparent. Use a high-quality JPG if the photo has a full background. Use a PDF if the photo is part of a larger layout with text or design elements.
Do I need to remove the background from my photo?
Only remove the background if you want the sticker to follow the subject. Keep the background if the full scene is important or if you want a rectangle, square, or circle photo sticker.
What size should a photo sticker be?
Most photo stickers work well between 2″ and 4″. Use 2″ to 3″ for simple pet, face, or logo-style stickers. Use 3″ to 4″ for detailed photos, group photos, or designs with text.
Are photo stickers better matte or glossy?
Gloss can make photo colors feel brighter and more vibrant. Matte gives the sticker a softer, lower-glare look. Both can work; choose based on the style of the image.
Can a blurry photo be fixed for sticker printing?
Sometimes a slightly soft photo can be improved, but a very blurry or low-resolution photo cannot be fully restored. It is better to start with the original high-resolution image.
Should photo stickers be printed on clear or white vinyl?
White vinyl is usually better for photo stickers because it gives the image a solid opaque base. Clear stickers are more surface-dependent and can change how photo colors appear.
Can I make a sticker from a pet photo?
Yes. Pet photos are one of the best uses for photo stickers. Choose a sharp photo, remove the background, clean up the fur edges, add a white border, and order it as a die cut sticker.
