
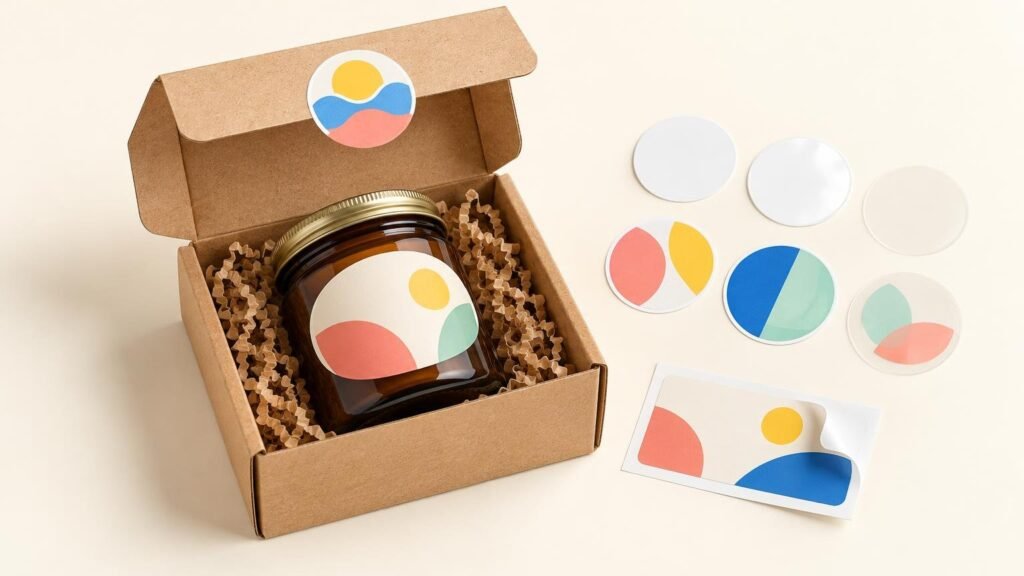
Stickers for small-business packaging add the most value when each one has a clear job. A product label helps a customer identify what they are buying. A branded seal improves the presentation of a plain box or tissue wrap. A thank-you sticker makes an online order feel more personal. A reorder sticker or QR code gives the customer a practical reason to return.
The strongest packaging setup usually does not cover every surface with a logo. It uses one or two well-planned stickers in places where they improve identification, presentation, handling, or the next customer action. That keeps the packaging useful without creating unnecessary printing and application work.
Start with the packaging job, not the sticker shape
Before choosing a circle, rectangle, or custom contour, decide what the printed piece must accomplish. The job determines whether you need an individual sticker, a product label supplied on a roll, a sheet containing several designs, or a combination of formats.
| Packaging job | Useful format | Production priority |
|---|---|---|
| Identify a product or variation | Roll label or consistently shaped label | Readable product details and repeatable placement |
| Brand a mailer, box, or shopping bag | Logo sticker or branded seal | A size that remains visible without dominating the package |
| Close tissue, paper bags, or lightweight wraps | Round or rectangular seal | Easy peeling and enough adhesive contact area |
| Add a thank-you message | Individual sticker or sticker sheet | Short copy that remains readable at the finished size |
| Encourage a reorder or review | Sticker with a short URL or QR code | Strong contrast, adequate blank space, and a tested destination |
| Include merchandise or a giveaway | Individual die-cut sticker | An appealing standalone design with a clean cutline |
YouStickers positions roll labels for bottles, jars, boxes, retail goods, and other repeat packaging applications. Individual stickers are better suited to merchandise, inserts, giveaways, and handouts. Its label rolls are designed for hand application or compatible label dispensers, making them the more practical choice when the same design must be applied repeatedly. For a closer workflow comparison, see roll labels versus sticker sheets for product packaging.
Product identification usually creates the most value
For a business selling candles, coffee, soap, baked goods, cosmetics, or other packaged products, the primary product label often does more work than any decorative sticker. It tells the buyer what the product is and helps distinguish one scent, flavor, size, or variation from another. It may also carry required or operational information, depending on the product.
Design these labels as part of a repeatable packaging system. Keep the brand name, product name, variation, and essential details in consistent positions. If several products share one container, a common label shape and hierarchy can make the line look coordinated while color or a small text field distinguishes each variation.
The delivery format matters as much as the design. Individually cut stickers may be perfectly workable for a limited launch or a small batch of gift boxes. Once employees are labeling hundreds of identical jars or pouches, a roll can reduce the time spent sorting, peeling, and aligning separate pieces. The right answer depends on order volume, application method, package shape, and whether multiple designs need to be available at the same packing station.
Branded seals can upgrade simple packaging
A branded seal is one of the most economical ways to make stock packaging feel intentional. One sticker can close tissue paper, hold a paper sleeve around a box, finish a bakery bag, or add a logo to an otherwise plain mailer.
Treat a decorative seal as a presentation element rather than a security device. An ordinary paper or vinyl sticker does not automatically provide tamper evidence. If visible evidence of opening is important, ask specifically about a material or construction designed for that purpose.
Placement affects both appearance and performance. A seal spanning a sharp fold or a deeply textured surface has less usable contact than one applied to a broad, smooth area. Curved containers also deserve a physical test because a label that looks correctly proportioned on a flat screen may wrinkle, lift, or distort when wrapped around a small radius.
Thank-you and reorder stickers support the next sale
A thank-you message is most useful when it is short, legible, and connected to the customer experience. It can sit on tissue, close an inner package, or appear on an insert. It should not force the customer to hunt for important product information or struggle through a paragraph of tiny type.
A reorder prompt can be even more functional. A short web address, recognizable social handle, or tested QR code gives the customer somewhere to go after opening the package. Keep the action specific: reorder this product, view care instructions, register a warranty, or see the full collection. One clear destination generally works better than several competing calls to action.
A barcode or QR code is not merely a decorative square. Print quality, contrast, surrounding blank space, placement, and the package itself can affect scanning. GS1 US barcode placement guidance recommends high-resolution barcode artwork, adequate contrast and clear space, and placement away from package edges. It also advises against shortening a UPC barcode simply to squeeze it into a design. Print and scan a physical sample before committing to a large batch.
Choose the format around the packing workflow
Stickers and labels may use similar printing methods, but the ordering intent differs. A sticker is often an individual branded object or promotional piece. A label is usually part of a packaging workflow, where consistent size, orientation, peeling, and repeat application matter.
- Choose individual die-cut stickers for giveaways, box inserts, merchandise, event handouts, or designs meant to stand alone.
- Choose roll labels when one design will be applied repeatedly to bottles, jars, pouches, bags, or boxes.
- Choose sticker sheets when a packer needs several small designs, such as a logo, thank-you message, care symbol, and decorative accent.
- Choose kiss-cut pieces when an easy-to-handle backing is helpful or when the backing area is part of the presentation.
If the distinction is still unclear, the difference between custom stickers and custom labels comes down largely to delivery format and use. Whether you order from a packaging specialist or compare custom printing through CustomStickers, confirm the supplied format, material, finish, orientation, and application method before approving the order.
Match the material to the package and environment
Material and finish should follow the actual use case. A label for a dry retail box faces different conditions from one applied to a refrigerated bottle or a jar handled with damp hands. The package surface may be smooth plastic, coated paperboard, glass, metal, kraft paper, or a textured pouch. Those surfaces do not all interact with adhesive in the same way.
Surface condition, application pressure, and temperature can affect adhesive performance. 3M notes that low-temperature application can reduce initial contact between an adhesive and its substrate. Apply labels to clean, dry surfaces under the conditions recommended for the selected product, then press the label firmly across its full area. For a new container or demanding environment, test finished samples on the actual package rather than assuming that a general material description guarantees the result.
Finish changes presentation and handling, but it is not the same thing as the underlying facestock or laminate. Gloss tends to emphasize color and reflected light. Matte usually produces a softer appearance and can reduce glare. YouStickers currently describes durable vinyl stickers and label options that may use matte or gloss finishes, while its label pages describe white and clear BOPP variants. Confirm material and finish availability for the exact product being ordered.
Clear packaging labels require another decision: which parts should remain transparent? White underprinting can place an opaque white layer beneath selected artwork, helping color and text remain visible while other areas preserve the clear effect. Without an intentional white layer, printed colors on clear stock can appear less opaque and may be influenced by the product or container behind them. YouStickers says high-opacity white ink is available for transparent or dark backgrounds, but the configuration should be confirmed for the selected label product.
Build the artwork at its final physical size
Packaging artwork often fails in small ways: a logo becomes fuzzy, legal or descriptive copy becomes too small, a border looks uneven after cutting, or a transparent background turns into a white rectangle. These problems are easier to prevent before ordering than after several hundred labels have been printed.
For raster artwork, YouStickers recommends 300 DPI at the final printed size. Final size is the important part. A small image can report a high resolution at one dimension but lose effective resolution when enlarged. Adobe's image-size and resolution guidance explains that enlarging a fixed-pixel image lowers its effective resolution. A logo that looks sharp at one inch wide may not remain sharp when expanded to four inches.
Vector files such as AI, SVG, and suitable PDFs are preferable when logos, geometric shapes, and text need to scale cleanly. YouStickers lists PNG, JPG, PDF, AI, and SVG among common accepted formats and recommends vector formats for scalable logos and text. PNG is the more useful raster format when transparency is required because JPG does not preserve a transparent background.
- Set the artboard or document to the intended finished dimensions.
- Use a vector logo when available, especially for small text and sharp geometric marks.
- Keep important words and logos comfortably inside the cut edge.
- Convert text to outlines or embed fonts when appropriate to prevent substitution.
- Check transparency deliberately instead of relying on a white screen background.
- Use CMYK-friendly colors and expect some difference between a glowing screen and printed output.
- Make sure a border follows the intended cutline and remains visually consistent around the shape.
If the sticker will be small, simplify before shrinking. Fine script, hairline borders, social icons, and long taglines can become difficult to read even when technically printable. The package should be evaluated at arm's length and under ordinary store, market, or home lighting—not only while the file is enlarged on a monitor. The guide to choosing sticker sizes for small-business packaging can help connect container dimensions with readable artwork.
Treat regulated information differently from branding
Packaging stickers sometimes carry ingredients, allergens, net quantity, warnings, business details, or other required information. Those elements should not be treated as optional decorative copy. Requirements vary by product, location, sales channel, and applicable exemptions.
For food products in the United States, the FDA's guidance for starting a food business says businesses are responsible for ensuring applicable labeling requirements are met and that food labeling is truthful and not misleading. Nutrition and major-food-allergen requirements depend on the relevant rules and exemptions. A printer can reproduce supplied artwork, but the business remains responsible for determining which statements its package must include.
Give required information enough space from the beginning. Trying to add ingredients, allergens, or a barcode after the front design has been finalized usually results in crowded type or an undersized label. For products with substantial information, consider separate front and back labels or a larger wrap label after confirming that it suits the container.
Use the proof as a packaging checkpoint
A digital proof is the point where artwork becomes a production plan. YouStickers provides an online proof before production and describes it as a chance to review layout, cutline or border, shape, and overall placement. It can also create a cutline when the customer has not supplied a production-ready path.
- Print a paper mockup at 100% scale and place it on the actual container.
- Check that the label fits the available flat or gently curved area without crossing unwanted seams.
- Read all text at normal viewing distance.
- Test every barcode and QR code from a physical sample.
- Confirm which areas are clear, white, metallic, holographic, or otherwise material-dependent.
- Verify the cutline and the distance between essential content and the edge.
- Approve the proof only after checking the current package, not an old container specification.
Order enough to learn without creating avoidable waste
A first order should support a real packaging run while leaving room to correct the system. Include allowance for setup samples, application mistakes, damaged containers, photography, and a modest amount of replacement stock. Avoid ordering an enormous first batch merely to reach a lower unit price if the product name, ingredients, container, branding, or barcode may change soon.
For repeat orders, track how many labels are consumed per finished unit and how many are lost during packing. Keep the approved file, proof, dimensions, material, finish, and order details together. YouStickers says approved artwork and cutlines may be retained to make reorders and size changes easier, but your own production record remains useful when packaging components or staff change. The guide to deciding how many custom stickers to order offers a more detailed starting framework.
Put each sticker where it earns its place
For most small businesses, the highest-value order of operations is straightforward: establish a clear product label first, add a branded seal where it improves plain packaging, and use a thank-you or reorder sticker only when it gives the customer a useful next step. Merchandise stickers can be worthwhile, but they should not take priority over labels that make the product understandable and easier to pack consistently.
Measure the actual package, choose a format that fits the application volume, prepare artwork at final size, and inspect the proof as if you were holding the finished piece. That approach turns packaging stickers from decoration into a practical part of the product and fulfillment workflow.
Frequently Asked Questions
When should a small business choose roll labels instead of individual stickers?
Choose roll labels when the same design will be applied repeatedly to bottles, jars, pouches, bags, or boxes. Individual stickers are usually more practical for inserts, giveaways, merchandise, and handouts.
How can I check whether a packaging sticker is the right size?
Print the design at 100% scale, cut out the paper mockup, and place it on the actual container. Check seams, curves, readable type, and the space between essential content and the cut edge.
What does white underprinting do on a clear label?
White underprinting adds an opaque white layer beneath selected artwork so text and colors remain visible while other areas stay transparent. Confirm that the chosen clear-label product supports the intended configuration.
What should I check before printing a QR code or barcode on packaging?
Use high-resolution artwork, strong contrast, adequate clear space, and placement away from package edges. Test scanning from a physical printed sample before committing to a large batch.
Can a printer determine which regulated information belongs on my product label?
The printer can reproduce the supplied artwork, but the business must determine which requirements apply. For U.S. food products, labeling must be truthful and not misleading, and required content depends on the relevant rules and exemptions.
References
- Custom Stickers & Labels | Free Proofs | YouStickers
- Custom Labels | YouStickers | Fast & Free Shipping
- Quality Standards – YouStickers
- Image size, resolution, and resampling in Photoshop
- Barcode Placement & Printing Guidelines | GS1 US
- Substrate Surface Consideration for Adhesive Selection
- How to Start a Food Business | FDA
- Custom Sticker Printing | Quality Vinyl | YouStickers
