
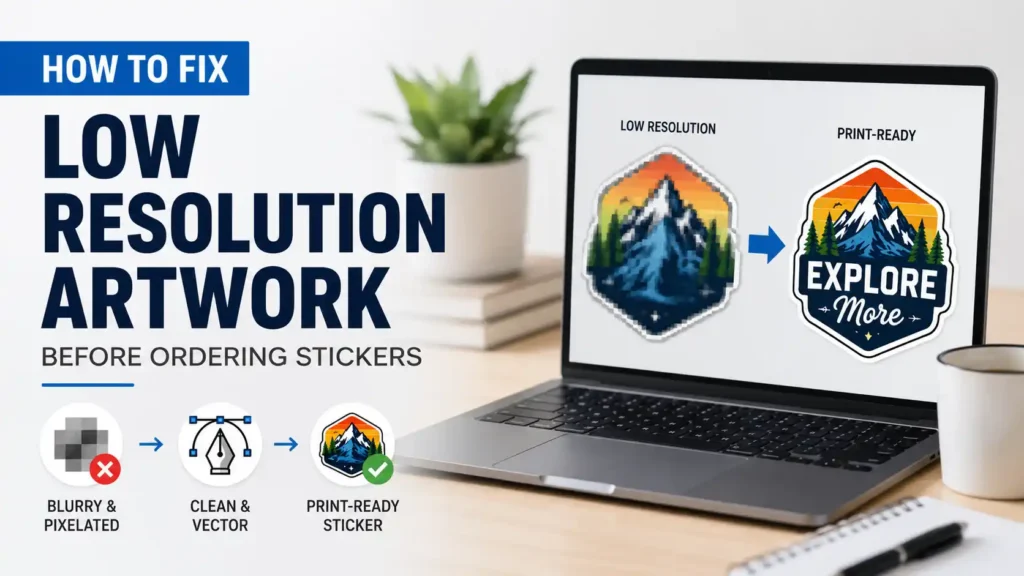
TLDR
- Low resolution artwork usually looks blurry, pixelated, jagged, or fuzzy when printed.
- The best fix is to find the original high-resolution file, vector logo, source design file, or larger version of the artwork.
- Simply changing a file from 72 DPI to 300 DPI does not magically add detail if the image still has too few pixels.
- Logos, icons, text, and simple graphics are often best fixed by converting or rebuilding them as vector artwork.
- Photos and detailed illustrations may need a better original file, careful upscaling, cleanup, or a smaller final sticker size.
- YouStickers recommends 300 DPI at final print size and accepts common raster and vector formats like PNG, JPG, PDF, SVG, and AI through its artwork upload process.
Why Low Resolution Artwork Causes Sticker Problems
Low resolution artwork is one of the most common reasons a sticker proof looks fuzzy, jagged, or less clean than expected. A design can look fine on a phone screen, social media post, or small website preview, but still not have enough detail for print.
Sticker printing is less forgiving than screen viewing because the artwork becomes a physical object. A blurry logo, tiny screenshot, compressed JPG, or small web image may show pixelation once it is printed at 2, 3, 4, or 5 inches wide. YouStickers recommends 300 DPI at final print size for clean results and lists PNG, JPG, PDF, SVG, and AI as common file options in its quality standards.
The goal is not just to make the file “say” 300 DPI. The goal is to make sure the artwork has enough real detail for the final sticker size.
What Low Resolution Artwork Looks Like
Low resolution artwork usually has one or more of these problems:
- blurry edges
- fuzzy text
- jagged outlines
- visible square pixels
- compression blocks
- dull or muddy details
- soft logos
- rough curves
- tiny artwork enlarged too much
- screenshots instead of original files
The issue is usually most noticeable around text, logos, thin lines, faces, QR codes, and clean geometric shapes. Those elements need crisp edges to print well.
If the sticker is a simple logo or badge, low resolution can make the entire design feel less professional. If the sticker is an illustration, low resolution may make the texture muddy. If the sticker includes small text, the text may become hard to read.
First, Check the Final Sticker Size
Before trying to fix the file, decide how large the sticker will be printed.
Resolution only makes sense when you know the physical size. A 900-pixel-wide image may be fine for a 3-inch sticker but weak for a 6-inch sticker. A tiny logo pulled from a website may work as a small icon but look terrible as a large die cut sticker.
A simple 300 DPI guide:
| Final Sticker Size | Ideal Raster Artwork Size |
|---|---|
| 2 in × 2 in | 600 px × 600 px |
| 3 in × 3 in | 900 px × 900 px |
| 4 in × 4 in | 1200 px × 1200 px |
| 5 in × 5 in | 1500 px × 1500 px |
| 6 in × 6 in | 1800 px × 1800 px |
This does not mean every sticker file must be square. It means the artwork should have enough pixels for the final printed dimensions.
Adobe also describes 300 PPI as an industry standard for high-quality prints viewed up close in its print resolution guidance. For stickers, that is a useful target because stickers are usually viewed from close range.
Do Not Just Change 72 DPI to 300 DPI
One of the biggest mistakes is opening a low-resolution file, changing the DPI number to 300, and assuming the artwork is fixed.
That usually does not solve the problem.
If the file only has a small number of pixels, changing the DPI setting does not recreate the missing detail. It may change how the file is interpreted for print size, but it does not turn a blurry screenshot into a crisp logo.
Think of it this way:
- A small image with enough pixels for a 1-inch sticker may print well at 1 inch.
- The same image enlarged to 4 inches may look blurry.
- Typing “300 DPI” into the file settings does not restore the detail that was never there.
The best fix is to start with a better source file.
Best Fix: Find the Original Artwork
Before editing anything, look for the best original version of the design.
Good source files include:
- original logo files
- AI, SVG, EPS, or PDF vector files
- original Procreate, Photoshop, or Illustrator files
- high-resolution PNG files
- high-resolution JPG files
- files from the designer
- files used for signs, packaging, embroidery, or print
- original scans of artwork
- export files from Canva, Adobe Express, or another design tool
Avoid using:
- screenshots
- social media images
- website thumbnails
- copied images from Google
- photos of a printed sticker
- compressed email previews
- tiny JPG files
- images saved from a text message
- logos pulled from a website header
If the design came from a designer, ask for the original vector file or a high-resolution print file. For logos, vector is usually best.
Fix Logos by Using Vector Artwork
If the low resolution artwork is a logo, icon, text design, badge, or simple graphic, the best fix is usually vector artwork.
Vector files are built from shapes and paths instead of pixels. That means they can scale cleanly without becoming pixelated. YouStickers recommends vector formats like PDF, SVG, and AI for logos and crisp text in its file requirements.
Vector is especially helpful for:
- business logos
- school logos
- team logos
- line art
- icons
- badge designs
- text-based stickers
- simple mascots
- geometric designs
- clean illustrations
If you have a vector version, upload that instead of a small PNG or JPG. If you do not have one, you may need to recreate the logo in vector form or ask the original designer for the source file.
Can You Use Image Trace?
Yes, sometimes. Image Trace tools can help convert a raster image into vector artwork, but they work best on simple graphics with clear edges.
Adobe’s Image Trace documentation explains that Illustrator can convert raster images into editable vector artwork. That can be useful for simple logos, black-and-white art, icons, and clean shapes.
Image Trace is less reliable for:
- blurry logos
- photos
- watercolor art
- tiny screenshots
- complex illustrations
- gradients
- soft shadows
- distressed textures
- small text
- detailed mascots
If the starting image is very blurry, tracing may create a cleaner-looking shape, but it may also distort letters, curves, and details. Always inspect the traced result closely. For important logos, manual vector rebuilding is usually better than automatic tracing.
Fix Photos by Finding a Larger Original
Photos cannot usually be fixed the same way as logos.
A photo is raster artwork, so it depends on pixels. If the image is too small, there is only so much you can do. You may be able to sharpen it slightly or use upscaling tools, but you cannot perfectly recover fine detail that is missing from the original file.
For photo stickers, look for:
- the original camera image
- the largest version from your phone
- the uncompressed file
- the original download from the photographer
- the image before it was sent through text or social media
- a high-resolution scan if it is a physical photo
Avoid using screenshots of photos or images saved from social media. Social platforms often resize and compress images, which can make them weaker for print.
Use Upscaling Carefully
Upscaling can sometimes improve a low-resolution file enough for a small sticker, but it is not a perfect fix.
Upscaling tools estimate new pixels based on the existing image. That can make the file larger and sometimes cleaner, but it may also create artifacts, strange textures, fake sharpness, or distorted details.
Upscaling works best when:
- the artwork is only slightly too small
- the final sticker is not very large
- the design does not include tiny text
- the image already has decent detail
- the file is cleaned up after upscaling
Upscaling is risky when:
- the file is extremely tiny
- the artwork is a screenshot
- the design has small text
- the logo must stay exact
- the image includes faces
- the sticker needs crisp brand quality
For logos, vector rebuilding is usually better than upscaling. For photos and detailed art, finding the original larger image is usually better than upscaling.
Reduce the Sticker Size If Needed
Sometimes the easiest fix is to print the sticker smaller.
A file that is too low resolution for a 5-inch sticker may be acceptable for a 2-inch sticker. If you cannot find a better file, reducing the final sticker size can help the artwork look sharper because the available pixels are packed into a smaller physical space.
This is especially useful for:
- small logo stickers
- event handouts
- packaging inserts
- simple art stickers
- laptop stickers
- planner stickers
- sticker sheets
Do not shrink the sticker so much that the text becomes unreadable. Reducing the sticker size can improve sharpness, but it can also make small details harder to see.
Clean Up the Edges
Low-resolution artwork often has rough or messy edges. Even if the main design is acceptable, the edges may need cleanup before the sticker is cut.
Look for:
- stray pixels around the artwork
- rough white halos
- leftover background color
- fuzzy outlines
- jagged cut edges
- transparent areas that are not actually transparent
- accidental boxes around the design
A clean background is especially important for die cut stickers. If the artwork has a white rectangle behind it, the proof may treat that rectangle as part of the design unless the intended cut shape is clear.
For custom-shaped stickers, YouStickers custom stickers can be made in custom sizes and shapes, and the proof helps show the setup before production.
Rebuild Small Text
Small text is one of the hardest things to rescue from low-resolution artwork.
If the text is blurry, pixelated, or distorted, do not just sharpen it. Rebuild the text using a real font whenever possible. This makes the letters crisp and easier to read.
Rebuild text when the sticker includes:
- business names
- phone numbers
- URLs
- social handles
- product names
- ingredient text
- warning text
- QR code instructions
- event dates
- slogans
After rebuilding the text, convert it to outlines or embed the font if you are sending a vector file. YouStickers recommends converting text to outlines or embedding fonts when possible in its quality standards.
Watch Out for QR Codes and Barcodes
QR codes and barcodes need to be crisp. A slightly blurry illustration may still look fine, but a blurry QR code may fail to scan.
Do not upscale a tiny QR code and assume it will work. Instead, regenerate the QR code at a high resolution and place it into the design at the final size.
For QR code stickers:
- use strong contrast
- avoid placing the code over a busy background
- leave quiet space around the code
- keep the code away from the cutline
- test scan the code at the final printed size
- do not stretch or distort it
If the QR code is important to the sticker’s purpose, treat it as functional artwork, not decoration.
Save the Fixed File Correctly
Once the artwork is improved, export the file in the best format for the design.
Use PDF, SVG, or AI for:
- logos
- vector artwork
- text-based designs
- icons
- clean shapes
- cutline-ready artwork
Use PNG for:
- transparent backgrounds
- raster illustrations
- artwork that needs a clean cutout
- high-resolution designs with no background box
Use JPG for:
- photos
- full-background artwork
- designs that do not need transparency
Avoid exporting a fixed vector logo as a tiny JPG. If the design was rebuilt as vector, keep it in a vector-friendly format so the crisp edges stay crisp.
Checklist Before Uploading Low Resolution Artwork
Before ordering, check:
- Did you find the largest available version of the artwork?
- Is there an original vector logo file?
- Is the final sticker size realistic for the file quality?
- Is the artwork 300 DPI at final size when possible?
- Are text and logos crisp?
- Are edges clean?
- Is the background actually transparent if needed?
- Are QR codes and barcodes regenerated at high resolution?
- Are fonts outlined or embedded when possible?
- Is the cut shape clear?
- Did you review the proof carefully?
YouStickers sends a free online proof before production so customers can review the setup, shape, and overall look before printing. The YouStickers homepage explains that the proof gives customers a chance to review the order before production starts through the custom sticker ordering process.
Common Mistakes to Avoid
Using a Screenshot
Screenshots are usually not ideal for sticker printing. They often have limited resolution and may include compression, blur, or unwanted background elements.
Downloading a Logo From a Website
Website logos are often small and optimized for fast loading, not print. Ask for the original logo file instead.
Changing DPI Without Adding Detail
Changing a file’s DPI number does not automatically fix a low-resolution image. The file still needs enough real pixels for the final print size.
Enlarging the Design Too Much
A design that looks good at 2 inches may look fuzzy at 5 inches. Match the sticker size to the file quality.
Using Image Trace Without Checking the Result
Automatic tracing can distort letters, curves, and details. Always inspect the vector result before ordering.
Leaving a Background Box
If you want a custom-shaped sticker, make sure the background is transparent or the desired cutline is clear.
Approving the Proof Too Quickly
The proof is your chance to catch resolution warnings, cutline issues, background problems, and layout concerns. Review it carefully before approval.
Practical Recommendation
The best way to fix low resolution artwork before ordering stickers is to start with the best source file you can find.
For logos, use or recreate vector artwork. For photos, find the original high-resolution image. For illustrations, export from the original design file at the final print size or larger. For QR codes and small text, rebuild them instead of trying to sharpen a blurry version.
If the file cannot be improved enough, choose a smaller sticker size or simplify the design. A clean small sticker usually looks better than a large blurry one.
FAQs
Can low resolution artwork be fixed?
Sometimes. Logos, icons, and simple graphics can often be rebuilt as vector artwork. Photos and detailed illustrations are harder to fix unless you can find a larger original file.
Does changing a file to 300 DPI fix it?
No, not by itself. The file still needs enough actual pixels for the final print size. Changing the DPI setting does not recreate missing detail.
What is the best resolution for sticker artwork?
For raster artwork, 300 DPI at final print size is the safest target. YouStickers recommends 300 DPI at final print size for clean printing.
Is PNG or JPG better for stickers?
PNG is usually better when you need transparency or a clean cutout. JPG can work for photos or full-background designs, but it does not support transparent backgrounds.
Can I use a screenshot for sticker printing?
A screenshot may print, but it is usually not the best choice. Screenshots are often too small or compressed. Use the original artwork whenever possible.
Should I vectorize my logo before ordering stickers?
Yes, if you have a clean logo or text-based design. Vector artwork usually gives the crispest result for logos, icons, and typography.
