
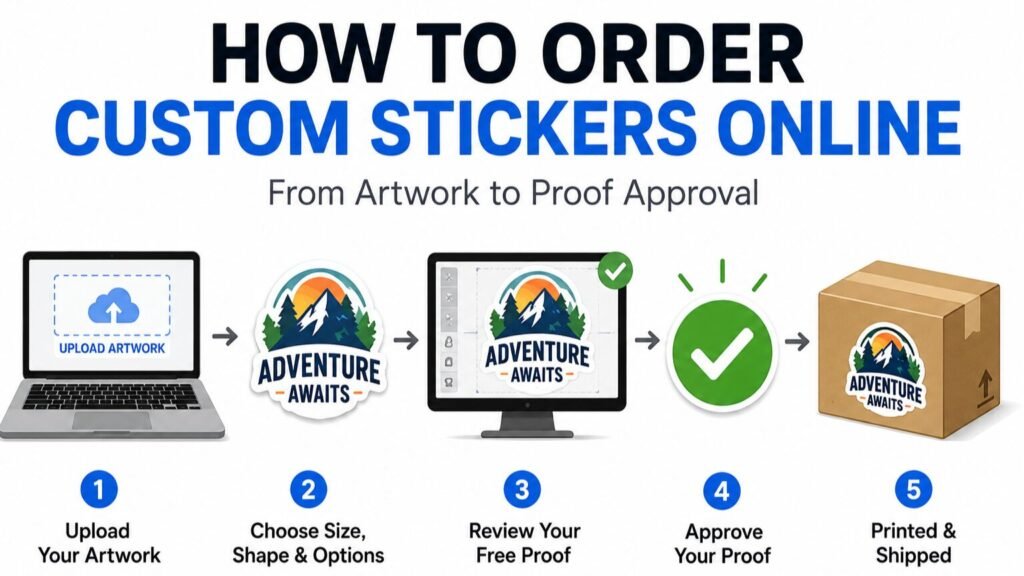
TLDR
- Ordering custom stickers online is easiest when you start with clear artwork, choose the right sticker type, pick a practical size, and review the proof carefully.
- For most first-time orders, custom vinyl stickers are the safest starting point because they work well for logos, merch, packaging inserts, laptops, bottles, events, and everyday branding.
- Upload the best version of your artwork you have. PNG, JPG, PDF, AI, and SVG are common upload formats for YouStickers orders.
- The proof is your chance to check the size, cutline, border, placement, spelling, and overall layout before printing.
- Do not approve the proof until everything looks right. Once a proof is approved, production is based on that approval.
Ordering custom stickers online can feel confusing the first time because you are making several decisions at once: artwork, size, shape, material, finish, quantity, and proof approval. The good news is that you do not need to understand every print term before you start. You just need to know what the sticker is for, upload the cleanest artwork you have, and review the proof carefully before production.
At YouStickers, the basic flow is simple: upload artwork, review a free online proof, approve the setup, and then the order moves into printing and shipping. YouStickers describes its process as custom stickers and labels in the sizes, shapes, and quantities you need, with a free online proof before production.
Step 1: Decide What the Sticker Is For
Before choosing a product, decide how the sticker will actually be used. This one decision affects almost everything else.
A sticker for a laptop is different from a label for a candle jar. A handout sticker at an event is different from a roll label for 500 bottles. A small logo sticker is different from a sticker sheet with several designs.
Use individual stickers when the design will be handed out, sold, included in orders, placed on laptops, added to water bottles, used at events, or given away as merch. YouStickers describes individual custom stickers as useful for merch, giveaways, packaging inserts, laptops, bottles, and everyday branding.
Use roll labels when the design goes on products in batches. Labels are better for jars, bottles, boxes, retail goods, and repeat application because they are made for packaging workflows.
A simple rule helps:
If someone will use it on its own, order stickers. If it identifies or packages a product, order labels.
Step 2: Choose the Right Sticker Type
Once you know the use case, choose the sticker format.
Common choices include:
- vinyl stickers for logos, merch, laptops, bottles, packaging inserts, and general use
- die cut stickers when you want the sticker shape to follow the artwork
- kiss cut stickers when you want easier peeling or extra backing around the design
- clear stickers when you want the surface underneath to show through
- holographic stickers when the material effect is part of the design
- bumper stickers for cars, outdoor messaging, and horizontal designs
- sticker sheets when you want multiple designs on one sheet
- roll labels when you are labeling products in batches
For most first-time projects, vinyl stickers are the easiest starting point. YouStickers describes them as its most popular sticker type: durable, weatherproof, laminated vinyl cut to any size and shape.
If you are not sure what to choose, start with the end use. A coffee shop logo sticker probably works as a vinyl sticker. A candle jar scent label probably works better as a roll label. A set of small artist designs may work better as a sticker sheet.
Step 3: Pick a Practical Size
Sticker size should match the design and how people will see it.
For logos, 2 to 4 inches is common because the sticker is large enough to read but still easy to use on laptops, bottles, notebooks, packaging, and giveaways. For tiny icons, 1.5 to 2 inches may work. For car windows, bumpers, equipment, or event signage, larger sizes may be better.
The most common mistake is choosing a size based only on price. A smaller sticker may cost less, but it can make small text unreadable. If your design has a phone number, website, QR code, ingredients, fine line art, or a detailed logo, it may need more space.
Before ordering, ask:
- Will the text be readable at the final size?
- Will the design look good from a few feet away?
- Is the sticker meant for a bottle, laptop, box, jar, car, window, or product?
- Does the shape need extra room around the artwork?
- Will a border make the sticker easier to read and cut?
A simple logo can usually be smaller. A detailed badge, mascot, QR code, or label layout usually needs more room.
Step 4: Upload the Best Artwork You Have
Artwork quality has a direct effect on print quality. A blurry screenshot usually prints like a blurry screenshot. A clean logo file usually prints cleaner.
YouStickers says customers can send designs as PNG, JPG, PDF, AI, or SVG files, and that files that are not fully print-ready can usually be cleaned up during proofing.
Good upload files include:
- original logo files
- high-resolution PNG files
- clean JPG files
- PDF files from a design program
- SVG or AI vector files
- artwork with transparent backgrounds when needed
- files sized close to the final print size
Avoid using:
- screenshots
- tiny website logos
- blurry social media profile images
- files copied from an email signature
- compressed images from messaging apps
- artwork with important details cut off
- low-resolution images enlarged far beyond their original size
If you have a vector file, use it for logos, text, and clean illustrations. If you have a high-resolution PNG, that can also work well for many sticker designs.
Step 5: Choose Shape and Border
The shape of the sticker is part of the design. A custom die cut shape can follow the outside edge of the artwork. A circle, square, rectangle, or oval can make the sticker feel more structured. A white border can make the design easier to read and easier to cut.
Use a border when:
- the design has dark edges
- the design will go on a dark surface
- the artwork has thin details
- the shape is complex
- the sticker needs a clean finished outline
- the design may be used on many different surfaces
Use a simple shape when:
- the sticker is a product label
- the design has a formal brand layout
- the artwork is text-heavy
- the sticker needs to be applied quickly
- you want a clean, predictable look
YouStickers creates the cutline and sends a free online proof before production, and customers can request revisions during the proofing stage before anything goes to print.
Step 6: Choose Matte or Gloss
Matte and gloss both work well, but they create different effects.
Choose matte if you want a softer look, less glare, and a more understated finish. Matte is a good fit for minimalist logos, product packaging, small text, premium-feeling branding, and clean design.
Choose gloss if you want more shine, color pop, and visual energy. Gloss is a strong fit for bold artwork, colorful designs, event stickers, sports stickers, kids’ stickers, and designs that should catch the light.
YouStickers custom stickers are printed on durable vinyl and finished with your choice of matte or gloss laminate. The laminate affects both protection and final appearance.
Step 7: Review the Proof Carefully
The proof is the most important step in the online ordering process.
A proof is not just a preview. It is the approval checkpoint before printing. It shows how the sticker is being set up, including size, layout, border, cutline, and artwork placement.
YouStickers’ quality standards explain that the proof is used to confirm layout, cutline or border, and overall placement. Once a proof is approved, the order is printed based on that approval.
Before approving, check:
- sticker size
- cut shape
- border width
- spelling
- logo placement
- background
- small text
- QR code placement
- barcode placement if applicable
- edge spacing
- colors
- orientation
- whether anything important is too close to the cutline
Do not rush this step. If something looks off, ask for a revision before approving. YouStickers notes that revisions can be requested during the proofing stage before the order goes to print.
What to Look for Before Proof Approval
Proof approval is where many sticker problems can be prevented.
Check the cutline first. Does it follow the artwork the way you expected? Is the white border too thick, too thin, or uneven? Are small details being cut too closely?
Check the design size. A sticker that looks large on your screen may be only 2 inches wide in real life. Imagine the final size in your hand, on a bottle, on a laptop, or on a package.
Check spelling and punctuation. The proofing process can catch layout issues, but it is still your responsibility to make sure names, URLs, phone numbers, ingredients, and event dates are correct.
Check small text. If it is hard to read on the proof, it may be even harder to read in print.
Check the background. If you want a transparent background, make sure the proof does not show an unwanted white box. If you want a white border, make sure it is intentional.
Step 8: Approve the Proof Only When It Is Ready
Only approve the proof when the sticker looks ready to print. After proof approval, production begins based on that approved setup.
YouStickers’ quality standards are clear that changing your mind after proof approval, uploading the wrong file, or requesting design changes after production begins is not considered a defect.
That does not mean proof approval should feel stressful. It just means you should slow down and check the important details before clicking approve.
A good proof approval question is:
Would I be happy if every sticker arrived exactly like this?
If the answer is yes, approve it. If the answer is no, ask for a revision.
Practical Recommendation
For most first-time online sticker orders, start with custom vinyl stickers, upload the cleanest version of your artwork, choose a practical size, and review the proof closely before approval.
Use stickers for merch, giveaways, packaging inserts, laptops, water bottles, and brand visibility. Use roll labels for jars, bottles, boxes, retail packaging, and repeat product labeling. YouStickers makes this distinction directly: stickers are for individual use and labels are for packaging workflows.
If you are unsure, do not overcomplicate the first order. A clean logo, a readable size, a durable vinyl material, and a carefully reviewed proof will solve most beginner sticker-ordering problems.
Common Mistakes to Avoid
Do not upload a tiny screenshot if you have a better file.
Do not make the sticker too small for the amount of detail in the design.
Do not choose clear stickers when the design needs a white background for readability.
Do not order roll labels when you really need individual handout stickers.
Do not order individual stickers when you need to label hundreds of jars or bottles.
Do not ignore the proof. It is the main checkpoint before production.
Do not approve the proof if the border, size, spelling, or cutline looks wrong.
Do not assume the printer knows your intent if the file is unclear. Use the proofing stage to clarify.
Do not put tiny text, phone numbers, or QR codes too close to the edge.
Do not wait until after proof approval to request design changes.
FAQs
What file should I upload for custom stickers?
Upload the cleanest artwork file you have. YouStickers accepts common formats including PNG, JPG, PDF, AI, and SVG for custom sticker artwork.
Do I get a proof before my stickers are printed?
Yes. YouStickers provides a free online proof before production so customers can review the setup, shape, and overall look before printing.
Can I request changes to my sticker proof?
Yes. You can request revisions during the proofing stage before anything goes to print.
What should I check on a sticker proof?
Check the size, cut shape, border, spelling, artwork placement, background, small text, and overall layout. YouStickers also explains that the proof is used to confirm layout, cutline or border, and overall placement.
Should I order stickers or labels?
Order stickers if the design will be handed out, sold individually, included in packages, or used on laptops, bottles, notebooks, or giveaways. Order labels if the design will go on jars, bottles, boxes, retail products, or packaging in batches.
Can I order just a few stickers?
Yes. YouStickers’ FAQ says there are no minimum order quantities and that customers can order a single sticker if they want.
