Learning how to make your own bumper stickers starts with a simple message, a readable design, the right sticker material, and a proof before printing.
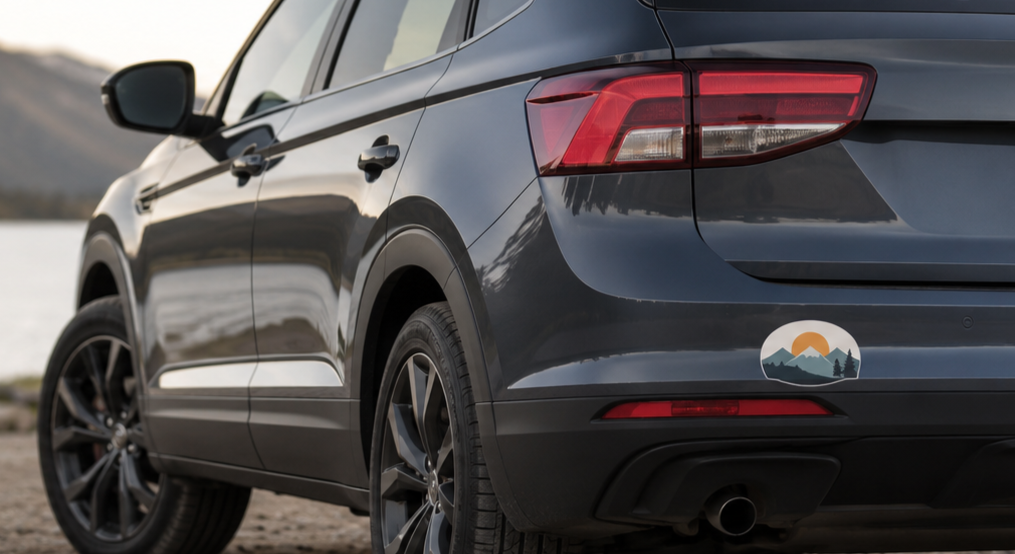
For a quick DIY version, you can use printable vinyl, laminate, and hand cutting. For a cleaner, longer-lasting bumper sticker, order from YouStickers.com. Their bumper stickers are made for cars, outdoor messaging, and longer horizontal designs.
Intent Sentence
This post helps drivers, small businesses, creators, campaigns, clubs, and everyday sticker buyers learn how to make your own bumper stickers by explaining design, sizing, materials, file setup, printing, and ordering options, so they can create bumper stickers that are readable, durable, and easy to use.
Introduction
Learning how to make your own bumper stickers is not hard, but bumper stickers do ask for a different design mindset than regular stickers. A small laptop sticker can be cute and detailed. A bumper sticker needs to be readable from several feet away, often while someone is walking by, sitting in traffic, or glancing at a parked car.
That is why the best bumper stickers are usually simple. They have a short message, strong contrast, clean type, and enough space around the design. They also need outdoor-friendly materials because a bumper sticker has to deal with sun, rain, road grime, car washes, and temperature changes.
In other words, the design matters. But the material matters too.
How To Make Your Own Bumper Stickers In Simple Steps
The basic process for how to make your own bumper stickers looks like this:
- Write a short, clear message.
- Choose a bumper sticker size.
- Create a readable design.
- Use outdoor-friendly vinyl if the sticker will go on a car.
- Export a high-quality file.
- Review the proof before printing.
- Apply the bumper sticker to a clean, dry surface.
That process works for funny bumper stickers, business bumper stickers, campaign stickers, school stickers, club stickers, event stickers, band stickers, nonprofit stickers, and personal car decals.
Still, the biggest choice is whether you want to print at home or order professionally. DIY bumper stickers can work for tests and short-term projects. Professional bumper stickers are better when the sticker needs to look polished and hold up outside.
Start With A Short Message
First, write the message before designing the bumper sticker.
A bumper sticker is not the place for a paragraph. It needs to be quick. If someone has to slow down and study it, the message is too long.
Good bumper sticker messages are usually:
- Short
- Clear
- Easy to read
- High contrast
- Memorable
- Focused on one idea
For example, a short slogan works better than a full sentence. A simple business name plus website can work. A campaign phrase can work. A funny line can work if the words are large enough.
As a rule, try to keep the main message under eight words if possible. You can go longer, but every extra word makes the design harder to read.
Choose The Right Bumper Sticker Size
Next, choose a size that fits the message.
Most bumper stickers are horizontal because car bumpers, tailgates, toolboxes, and rear windows often suit a wide layout. Classic bumper sticker sizes are usually long rectangles, such as 10 inches by 3 inches or 11.5 inches by 3 inches.
YouStickers also lists common bumper sticker size options like 8″ x 3.5″, 10″ x 3″, 12″ x 3.5″, 14″ x 4″, and custom sizes. That gives you room to choose a standard look or create something more specific to your design.
Here is a simple size guide:
| Bumper Sticker Size | Best Use |
|---|---|
| 8″ x 3.5″ | Short slogans, small logos, simple designs |
| 10″ x 3″ | Classic bumper sticker layout |
| 12″ x 3.5″ | Larger slogans, brand names, event stickers |
| 14″ x 4″ | Big, bold messages or high-visibility designs |
| Custom size | Unusual shapes, badges, mascots, or custom layouts |
If you are learning how to make your own bumper stickers for the first time, a 10″ x 3″ horizontal layout is a good starting point.
Design For Readability First
After the size is set, build the design around readability.
Bumper stickers are usually viewed from a distance. Because of that, bold fonts tend to work better than thin or decorative fonts. High contrast also matters. Dark text on a light background or light text on a dark background is easier to read than low-contrast colors.
Use large type. Keep the layout open. Leave space around the edges. Avoid tiny secondary lines unless they are truly needed.
A good bumper sticker should pass this test: print it at size on regular paper, tape it to a wall, and step back 20 to 30 feet. If you cannot read it quickly, simplify the design.
This is not the most glamorous design test. But it works.
Pick Colors That Work On Cars
Color choice matters because bumper stickers live in bright sunlight, shade, dust, glare, and rain.
For most bumper stickers, simple color palettes work best. Two or three strong colors are usually enough. A high-contrast background and bold text will do more than a complicated full-color design.
For business bumper stickers, use your brand colors if they stay readable. If your brand colors are soft or low contrast, consider adding a white border, darker outline, or simpler background.
Also think about the car itself. A dark sticker may disappear on a dark vehicle. A light sticker may disappear on a white vehicle. A border can help the bumper sticker stand out on more surfaces.
Use Outdoor Vinyl, Not Paper
A major part of learning how to make your own bumper stickers is choosing the right material.
Paper stickers are not a good choice for cars. They are fine for indoor craft projects, notebooks, folders, and temporary labels. But they do not belong on a bumper. Paper absorbs moisture, tears more easily, and breaks down outside.
Vinyl is the better choice. For bumper stickers, you want durable vinyl with a protective laminate. The laminate helps protect the print from sun, rain, scratches, road grime, and normal outdoor wear.
YouStickers bumper stickers are made with weatherproof vinyl and UV laminate. That is the kind of material setup you want if the sticker is going on a car, truck, trailer, toolbox, or outdoor surface.
DIY Option: Print Bumper Stickers At Home
There are cheap ways to make bumper stickers at home, especially if you only need a few.
The basic DIY method is:
- Design the bumper sticker.
- Print it on printable vinyl.
- Let the ink dry fully.
- Add clear laminate over the print.
- Cut the sticker to shape.
- Apply it to a clean surface.
This can work for a short-term sticker, a test design, or a personal project. However, home printing has limits. Your printer may not produce the same color, durability, or waterproof finish as professional printing. Cutting a long rectangle cleanly can also be harder than it sounds if you do not have a paper trimmer or cutting machine.
So, while DIY is useful, it is not always the best choice for finished bumper stickers.
Professional Option: Order From YouStickers.com
The easiest way to handle how to make your own bumper stickers is to order from a sticker printer that already works with outdoor vinyl, laminate, proofing, and vehicle-friendly formats.
YouStickers.com offers custom bumper stickers that are made for cars, outdoor messaging, and longer horizontal designs. You can upload your design, choose the size, select matte or gloss, and review a proof before production.
That proofing step is helpful because bumper stickers need clean margins, readable text, and a clear layout. If the design is too close to the edge or too small to read, the proof is where you can catch it.
For most finished projects, this is the better route. DIY is fine for testing. Professional printing is better for stickers you plan to sell, give away, use for a business, or put on actual vehicles for long-term use.
Matte Vs Gloss Bumper Stickers
Bumper stickers often come in matte or gloss finishes.
Gloss is shinier. It can make colors feel brighter and works well for bold logos, bright slogans, and high-impact designs.
Matte has less glare. It can feel cleaner and more subtle, especially for simple typography, minimalist designs, and darker color palettes.
Both can work. The bigger issue is whether the sticker is laminated and made for outdoor use. A laminated matte bumper sticker is usually better than an unlaminated glossy sticker if durability matters.
If you are not sure, choose gloss for brighter visual impact and matte for lower glare.
Use The Right File Type
If you are learning how to make your own bumper stickers from a design file, start with the cleanest version of your artwork.
For logos and text-heavy designs, vector files are best. AI, SVG, PDF, and EPS files usually keep type and shapes sharper.
For image-based bumper stickers, use a high-resolution PNG, JPG, TIFF, or PDF. Make sure the artwork is large enough at the final print size. A tiny image pulled from social media may look fine on a phone but print blurry at bumper sticker size.
YouStickers recommends 300 DPI at final print size when possible. They also recommend vector formats for logos and crisp text, plus keeping important text and logos away from the edge.
Leave Room Around The Edges
Margins matter on bumper stickers.
Keep important text and logos away from the cutline. If the design goes all the way to the edge, add bleed so the background can print cleanly without leaving an accidental white edge.
A safe layout has:
- Room around the text
- No tiny details near the edge
- Strong contrast
- A clean border or background
- Enough spacing between design elements
If you want rounded corners, YouStickers can create rounded corner bumper stickers. Rounded corners can be a nice choice because they look finished and are less likely to feel sharp or awkward on a long rectangle.
Apply Bumper Stickers Correctly
Even a good bumper sticker needs a clean application.
Before applying it, wash and dry the surface. Remove dirt, dust, wax, oil, and residue. A smooth, clean surface gives the adhesive a better chance to bond.
Then start at one edge and smooth the sticker down slowly. Use a card or squeegee to push out air as you apply it.
After installation, avoid pressure washing, waxing, or rough cleaning for a few days. This gives the adhesive time to settle.
Also, avoid placing bumper stickers where they block visibility, cover sensors, interfere with license plates, or sit on damaged paint. Smooth painted panels, glass, tailgates, trailers, and toolboxes are usually better surfaces.
Common Mistakes To Avoid
The first mistake is using small text. Bumper stickers need to be read from a distance, so large type is your friend.
Another mistake is using low-contrast colors. Subtle colors may look nice on a screen but disappear on a moving vehicle.
A third mistake is using paper sticker material. Paper is not built for outdoor car use.
Also, do not upload a low-resolution file. Blurry artwork will still be blurry after printing.
Finally, do not skip the proof. The proof is your chance to check the size, margin, spelling, border, and layout before the bumper stickers are printed.
When To Choose A Different Sticker Type
Bumper stickers are not the only vehicle-friendly option.
Choose bumper stickers when you want a long horizontal message, slogan, cause, business name, or classic car sticker layout.
Choose car decals if you want a more custom vehicle graphic, logo, or decorative design.
Choose weatherproof stickers if the sticker may go on gear, bottles, equipment, trailers, or outdoor surfaces but does not need the classic bumper sticker shape.
Choose vinyl stickers if you want an all-purpose durable sticker that can work on laptops, water bottles, packaging inserts, and many smooth surfaces.
The right product depends on where the sticker goes and how it will be used.
Order Bumper Stickers From YouStickers.com
The easiest way to make your own bumper stickers is to upload your design to YouStickers.com.
Start with bumper stickers if you want a classic car sticker shape for slogans, logos, causes, jokes, clubs, campaigns, or business messages.
Use custom stickers if you are still comparing formats. You can choose vinyl stickers, clear stickers, holographic stickers, sticker sheets, bumper stickers, roll stickers, and more from one place.
For most bumper sticker projects, the professional route is simpler: upload your artwork, choose the size and finish, review the proof, and approve the order for printing.
FAQs
How Do You Make Your Own Bumper Stickers?
To make your own bumper stickers, create a short readable design, choose a bumper sticker size, use durable vinyl, upload a high-quality file, review a proof, and print the stickers on outdoor-friendly material.
Can I Print Bumper Stickers At Home?
Yes, you can print bumper stickers at home using printable vinyl and clear laminate. This works best for short-term use, testing, or small personal projects. For long-term outdoor use, professional printing is usually better.
What Size Should A Bumper Sticker Be?
Common bumper sticker sizes include 10″ x 3″, 11.5″ x 3″, 12″ x 3.5″, and similar horizontal formats. The best size depends on the length of the message and where the sticker will go.
What Material Is Best For Bumper Stickers?
Durable outdoor vinyl with protective laminate is best for bumper stickers. Paper stickers are not recommended for vehicles.
Should Bumper Stickers Be Matte Or Gloss?
Gloss is brighter and shinier. Matte has less glare and a softer look. Both can work, but outdoor vinyl and laminate matter more than the finish choice.
Can You Make Rounded Corner Bumper Stickers?
Yes. Rounded corners are a good option for classic bumper sticker layouts, and YouStickers can create rounded corner bumper stickers.
Conclusion
Learning how to make your own bumper stickers comes down to a few practical choices. Keep the message short. Use bold, readable type. Choose a size that fits the layout. Use durable vinyl with laminate. Then review the proof before printing.
DIY bumper stickers can work for testing and short-term projects. However, if the sticker is going on a car, being handed out at an event, sold as merch, or used for a business, professional printing is usually the better choice.
For most finished bumper sticker projects, YouStickers.com is the easiest place to start.

